 |
| http://www.etsy.com/listing/88109756/gingerbread-hawaii-couple?ref=v1_other_1 |
Enough of that store bought stuff! Time to make some gingerbread on my own and make some ornaments!
 I started off by trying to find a recipe online for a tough cookie that would hold up even if I dropped the ornament. But after the highly-rated recipe gave me a giant pot of crumbly dough, I decided to do my own thing.
I am proud to say that my recipe created tough cookies perfect for ornaments: I had left some cookies outside for 2 seconds thinking it would dry faster there than in my kitchen. I put them outside, went inside, and though "Oh no, the neighbor leaves his dog outside and she might smell it and come eat it." I turned right around and surely enough the golden retriever was biting at one of my tree ornaments. The ornament got wet but remained intact.
AND it truly smells deliciously Christmassy!
So here is the recipe:
Ingredients:

- 1 cup shortening

- 7 cups flour
- 1 tablespoon cocoa
- 1 1/2 tablespoon cinnamon
- 1 1/2 tablespoon nutmeg
- 1 teaspoon baking soda
- 1 cup molasses
- 1 cup dark corn syrup
- 1/2 cup water if necessary
- cookie cutters
Directions:
1. Cream shortening and sugar in a large bowl or a big pot.
 2. Add flour, cocoa, cinnamon, nutmeg, baking soda, molasses, and dark corn syrup into the mixture and mix well. Instead of 1 1/2 tablespoon cinnamon and nutmeg, you can do 1 tablespoon each of cinnamon, nutmeg, and ground cloves. Now you have to get your hands dirty and just knead the Christmassy dough with your hands to get it nice and clumped together.
3. Lastly, add the 1/2 cup of water gradually as necessary to form the dough into a giant clump.
4. Wrap the dough up in wax paper and refrigerate until cold (roughly 3 hours).
5. Preheat oven to 350 F. Line cookie sheets with aluminum foil.
6. Remove the dough from the refrigerator and use a rolling pin to roll out the dough into an even 0.75cm thick layer.
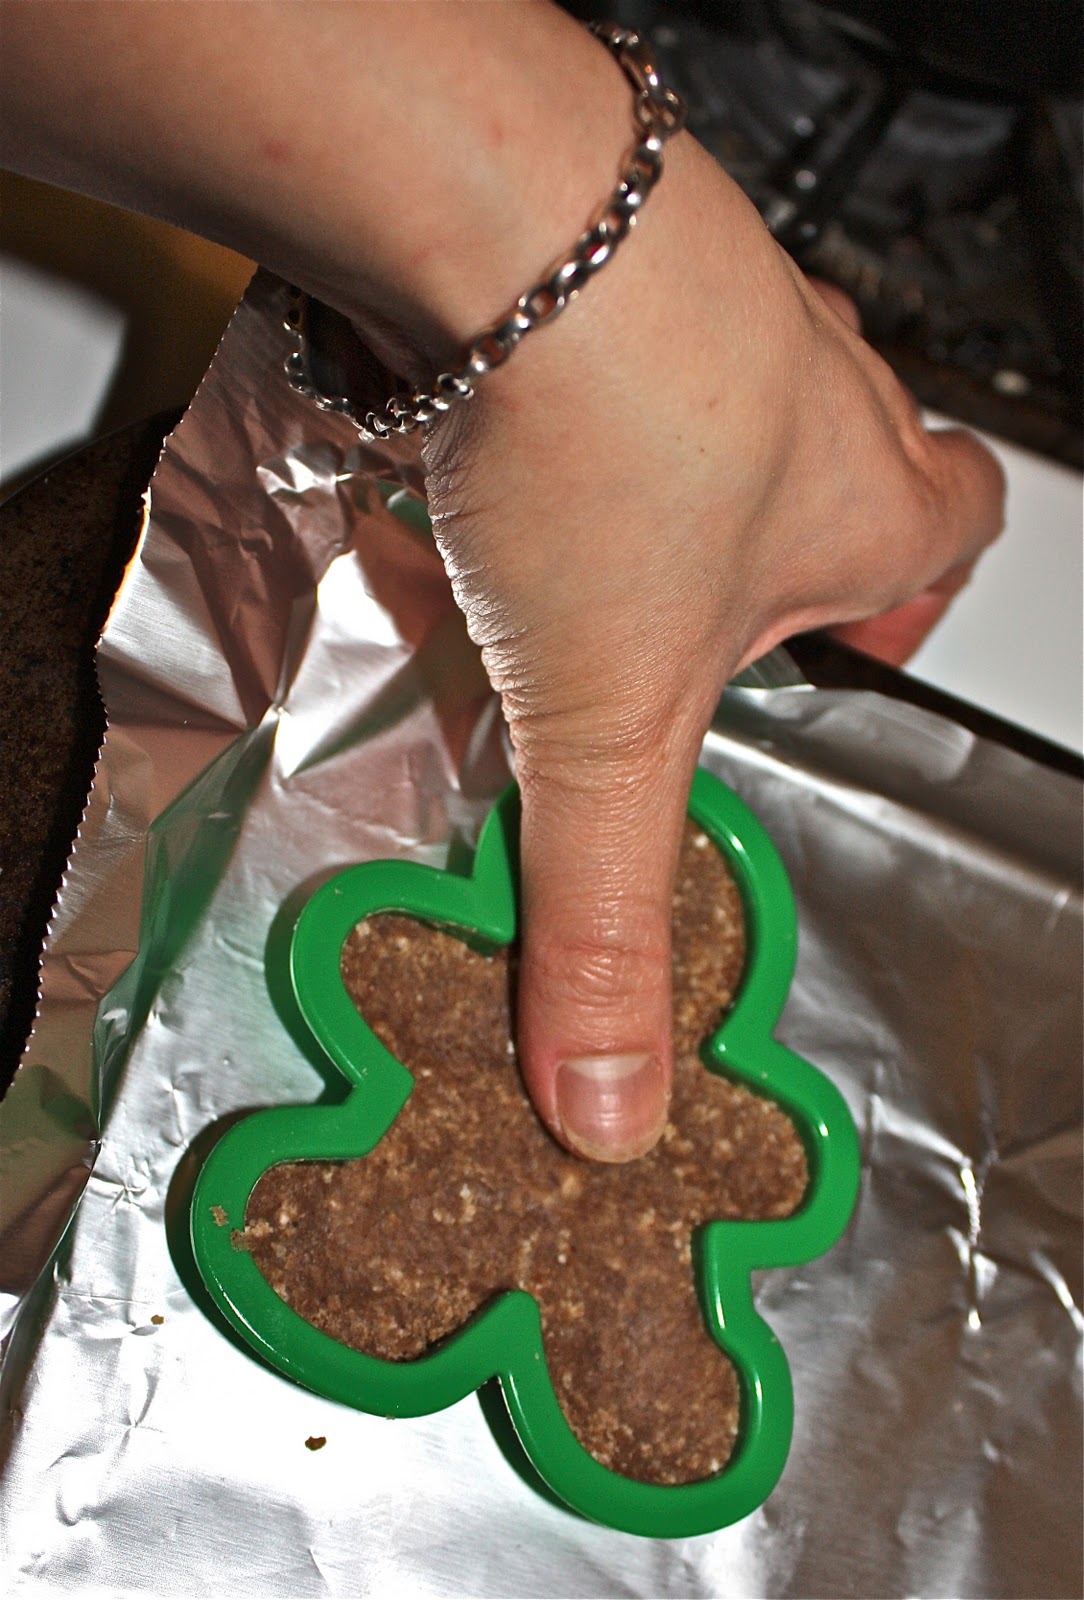
 7. This step may seem a little different from usual cut out cookies: Use a cookie cutter to cut into the layer of dough, leave the cookie cutter in the dough and remove the dough around the cookie cutter.
 8. Transfer the cookie dough and the cookie cutter together to your aluminum foiled cookie sheet. Using your thumb, press down firmly and evenly throughly the cookie to make your cookie extra tough.
9. Use a chopstick or straw to make a 3mm diameter role on your cookie.
10. Remove the cookie cutter carefully from your cookie.
11. Bake 25-30 minutes. (I baked mine for 30 minutes because my oven is not very good and so I think it is always slightly cooler than I set it to. But just peek to see how it looks, and it should be done between 25 to 30 minutes).
12. Let cool on the cookie sheet for 10 minutes before transferring to a cookie rack. Let cool on cookie rack for 2-3 days to ensure cookie is hardened before you decorate it.

Really, its probably edible if you baked it less long and let it be softer. It might even taste good, after all its made of sugars, syrups, and shortening!
To decorate, you can use different colors of icing - buy it pre made or make it yourself. I usually just buy it pre made when I do not plan on eating it because it tastes better when you make fresh icing yourself.
Michaels and Party City also has a huge variety of icing sugars: Little candy canes, mistletoes, little gingerbread men, Christmas trees, colored dots. You can also use candies: chocolate chips, M&Ms, candy canes, Jellybeans. Household items: ribbons, buttons, miniature toys.


They are so much fun to make and look at! Have fun!
No comments:
Post a Comment